You Can Can Cheese! And Dehydrate! How to Preserve Your Own Cheeses

cheese

Alright, I am an admitted cheese hound…don’t believe I have met any cheese that I didn’t like but I always thought for long term storage that you either had to keep it refrigerated or as someone I know did on TV, you had to wax it for long term storage. OR you had to buy the freeze dried stuff at something close to a mortgage payment. Imagine this…you can CAN any cheese (water bath or pressure) or dehydrate it as I did previously with cottage cheese. And do so safely! Ssshhh! Don’t tell the food police I said that!

Dehydration:
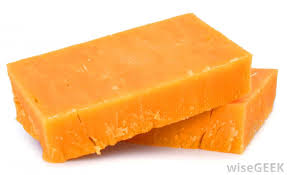
Pretty straight forward…I love cheddar cheese but this will work with ANY type of cheese.
20140928_1
Place your chosen cheese on a fruit leather tray thinly and dehydrate at 125 degrees until crunchy and vacuum seal!

There is a catch however. If you use regular cheese you will have to deal with the ‘fat’ that comes out of it. Originally I thought I would get smart and well, put paper towel under it while dehydrating but when I checked it half way through some had ‘melted’ to it. So don’t that at home folks…instead, dehydrate and after doing so place on a towel and pat the oil off and then vacuum seal! Each pouch contains approximately 1 lb of shredded cheddar cheese. Great crunchy snack by the way!
20140928_2

Next, I got squirrelly and tried canning it. You can can any cheese! Quartz, pints or half pints…it up to you as is the method either water bath OR Pressure canner. It is recommended for best results as to texture, taste and color to use the water bath method and here is how you do it:

Just like canning anything you will want sterilized jars and lids…get your canning water going so that it is ready and the lids too.

You will then take your clean jars and place them into a pan or pot that is big enough to hold the empty jars. Next, fill the pot/pan with enough water to get the water level at least 1/3 of the way up the side of the jars.
20140928_3

Turn on the heat and add small amounts of cheese (either shredded or cubed, I used shredded) to each jar, stirring occasionally as it melts. Add more cheese and allow to melt and so on until you have the jars full of melted cheese leaving ½ inch head space.
I used a clean butter/dinner knife to stir.
20140928_4
Turn off the heat. Because most cheese is ‘greasy’ I used straight vinegar to clean the jar lips and ring area. Then add the lids and rings as you usually would. Finger tight and then place into the canner.

If you choose to use the water bath method as I did here are the processing times:
Start the time once it comes back to a boil.

Pints and half pints for 30 minutes
Quartz for 45 minutes

If you are using a pressure canner please remember to build up the pressure as normal and then bring to proper pressure then start your time:

Less than 1,000 feet in elevation:
Quartz: 10 minutes at 10 lbs pressure
Pints and half pints: 5 minutes at 10 lbs pressure

Over 1,000 feet in elevation:
Quartz: 10 minutes at 15 lbs pressure
Pints and half pints: 5 minutes at 15 lbs pressure.

Final product:
20140928_6

As always, remember to carefully take out, place on a towel and cover to allow the processed jars to cool and seal properly. Once cool they will solidify again and presto! Real canned cheese!

Note: best to use wide mouth jars for ease of getting back out!

always faithful
survivingshtfmom

Pressure Canned Sweet and Sour Chicken

20150103_19

I like to play around with my canning. I often find great deals on meat at the grocery store and given how expensive meat has become I will pick up every reduced priced piece of meat they have. But what I have run into is a complete lack of canning recipes for ‘meals’. Yes, there are soups out there and your traditional ‘how to can meat’ but a meal? Not much so I have turned to traditional meals and other types of recipes from old cook books and have found that I can can most of it so that all I have to do is add rice or pasta or something else for a fast and delicious meal.

We like Chinese food, especially sweet and sour chicken but it can be time consuming to make it for dinner and I thought: ‘why not pressure can it?’ so we can heat and eat. It is super easy to do and tastes delicious over rice.
The following recipe is enough for 7 quarts which is about 2-3 people over rice.

Get all your supplies ready. 7 quart jars, lids, pressure canner, etc. PLEASE! Remember that the new Ball Canning Lids do NOT get boiled any more. Simply wash and get them ‘warm’. I like to put them in a pan and turn my stove on the ‘melt’ setting. If you boil the new lids you might just find out down the road that they won’t stay sealed.

What you will need for the recipe:
5 lbs of raw chicken thigh meat (or breast if that is what you have)
2 lbs of shredded carrots
1 large can of crushed pineapple
3 small cans of water chestnuts
2 medium onions
2 Cans of corn
Sweet and Sour Sauce (make your own or if you want you can buy a jar of it)

Remember, a recipe is but a suggestion! Add or subtract to your taste.

First, cut up your raw chicken into bite sized chunks. Place into large container (I tend to use my water bath canner for mixing up large batches of food).
Chop up to your taste the onions and add to the chicken.
Add your shredded carrots

Next, get your sweet and sour broth going. I use a 4 quart sauce pan and typically will put 3 quarts of water into it and then add whatever flavoring I will use. I got lucky and found a bunch of pre-made sauces and marinades for 99 cents each. A few were sweet and sour marinades. So I added 2 12 ounce bottles to the 3 quarts of water and stirred well and brought to a boil and then turned down to a simmer while I finished up the food part.

Drain your crushed pineapple into the simmering sweet and sour water.
Drain your water chestnuts into the simmering sweet and sour water.
Drain your corn into the simmering sweet and sour water.

Next, dump your crushed pineapple and water chestnuts in with the carrots, chicken and onions. Mix well.

Now you are ready to can.

Evenly distribute your chicken mix into the 7 jars.
Pour your sweet and sour broth to about ½ inch head space.
Stir using a knife to get out air pockets and bubbles. Add more broth if necessary.
Clean the lip of jar with vinegar.
Place lids and rings on.
Put jars into canner as usual and you know what to do next.

Processing time is 70 minutes at 10 lbs pressure. And YES that is more than adequate to get the chicken thoroughly cooked!
Allow to cool as usual.

To use:
Simply open jar and heat up while you are cooking your rice! Put over rice and enjoy!

Have fun canning!
Survivingshtfmom